 Yeast & Bacteria Bank
 Enzymes & Nutrients
 Lab Services
 Education
 Merchandise
Cell Counting Your Yeast Culture
Category : Technical
Date : July 29, 2021
Author : White Labs Technical Team
Cell counting yeast is one of the top 5 lab tests you can do in your brewery with little investment or scientific background. With just a microscope, pipettes, a hemocytometer, and a little math you can be cell counting in no time!
The procedure below is a beginner or intermediate cell counting and viability method. Once you’ve mastered cell counting your slurries, you can develop some of your own techniques and dilutions for different stages of your fermentations. We recommend performing cell counts in duplicate at a minimum and averaging the results.
See our cell counting tutorial here:
Be sure to also see White Labs Microscope Kit!
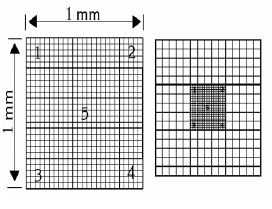
Figure 1
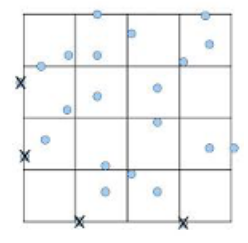
Figure 2
= 220 x 5 x 200 x 104 = 2,200,000,000 = 2.2 x 10⁹ or 2.2 billion cells/mL
Viability:
# Live cells/Total cells counted x 100= % Viability
The procedure below is a beginner or intermediate cell counting and viability method. Once you’ve mastered cell counting your slurries, you can develop some of your own techniques and dilutions for different stages of your fermentations. We recommend performing cell counts in duplicate at a minimum and averaging the results.
See our cell counting tutorial here:
Cell Counting / Viability Testing
Materials:Be sure to also see White Labs Microscope Kit!
- 0.01% Citrate Methylene Blue solution or 0.01% Alkaline Methylene Violet solution
- Hemocytometer
- Transfer pipettes, micropipette, or Pasteur pipettes
- Handheld counter
- Kimwipes or other lint-free paper
- Gloves
- Microscope with 400x capability
- 9mL dilution tubes
- 15mL centrifuge tubes
- Sample
- 0.1% EDTA (10% EDTA needs to be diluted) or 0.5% H2SO4 (Optional/Flocculant cells)
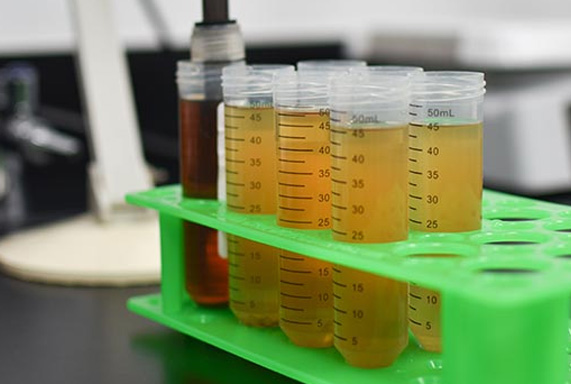
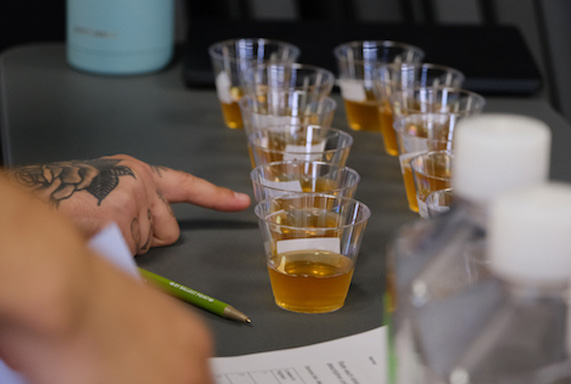
- Dilute yeast sample to an appropriate concentration. Usually, a 1:100 typically works well for yeast slurries. It is best to have 25-60 yeast cells per microscope square at 400x with cells evenly distributed. Sample can be diluted with deionized/distilled water. For flocculant cells use 0.1% EDTA or 0.5% H2SO4. Remember to always note your dilution factor!
- Invert the sample several times to mix well.
- Mix 1mL of your diluted yeast sample with 1mL of methylene blue solution and allow to incubate for 1-2 minutes
- Invert sample 1-2 times, and withdraw sample by placing a glass pipet tip into the liquid mixture and letting it fill via capillary action (draw upwards automatically) or using a transfer pipette. You need approximately 10uL to fill the chamber
- Fill the chamber by using capillary action with the slide and the grid. See the video for a visual of this. If there is too much liquid, the microscope will have difficulty focusing
- Position the coverslip so that the glass cover is flush to one side of the grid
- Carefully place the hemocytometer on the microscope stage. As you focus on each objective leading up to the 40x lens, note the distribution of yeast cells. Cells should be evenly distributed. If not, clear the sample from the hemocytometer and repeat. You will be counting cells within the 5 numbered squares- corners and middle grid. (Fig. 1)
Considerations when cell counting:
- You will be counting squares within the 1mm 2-ruled area centrally located on the chamber For example, cells touching or lying on the top and right boundary lines are not counted, whereas cells touching or lying on the bottom or left boundary lines are counted (Fig. 2)
- Yeast cell buds emerging from mother cells are counted as a separate cell if the bud is at least one-half the size of the mother cell
- If performing viability counts, dead cells will stain dark blue using Citrate Methylene Blue and purple/pink using Alkaline Methylene Violet. Non-viable cells do not have the metabolic capability to expel the intruding dye.
- Do not count cells that are pale in color as dead. Some budding cells will also stain, do not count these cells as non-viable
- If you are performing a cell count and viability count simultaneously, it is best to count all cells on the handheld counter and record noted dead cells on a written tally on the previous page).
Figure 1
Figure 2
Calculations:
“Total number of cells counted” x 5 x “Dilution Factor” x 10,000 = “X” cells/mL- 5 represents the average of the entire grid (25 squares total)
- 10,000 represents the volume of the chamber
- Your dilution factor for this method would be 200. The yeast was diluted 1:100 and then 1:1 with dye
= 220 x 5 x 200 x 104 = 2,200,000,000 = 2.2 x 10⁹ or 2.2 billion cells/mL
Viability:
# Live cells/Total cells counted x 100= % Viability
Want More Tips, View Our Cell Counting Tips Series
- TECHNICAL
- April 4, 2024
- TECHNICAL
- November 16, 2023